
How to Build Shed
Learning how to build shed from the ground up is an incredibly rewarding experience that can save you money and provide a highly functional outdoor storage space tailored to your specific needs. Whether you’re looking to store garden tools, outdoor equipment, or even create a workshop, constructing your own shed offers the flexibility to customize its size, style, and features. This guide walks you through the complete process, from planning and material selection to framing and finishing, ensuring you have the knowledge to build a durable and practical shed on your property.
Planning the Shed Project
The first step in building a shed is creating a comprehensive plan. Determine the shed’s intended use, whether it’s for storage, a potting shed, or a small workshop. Then, decide on the appropriate size. A basic garden shed may only need 6×8 feet, while a workshop or equipment shed might require 10×12 or larger.
Once you’ve settled on the shed’s dimensions, consider the location. Choose a site that is level, easily accessible, and not prone to flooding. Check local building codes and zoning regulations to see if you need a permit. Planning ahead for electrical wiring, ventilation, and lighting can also influence the design.
Sketch your shed’s layout, either by hand or with the help of shed design software. Include dimensions, roof pitch, door placement, and window locations. A well-thought-out plan ensures the rest of the construction process flows smoothly. If you are lost, there are many prefab shed options available. Check our sheds that are in stock on our lot for inspiration.
Choosing the Right Materials
The quality and longevity of your shed depend heavily on the materials you choose. Pressure-treated lumber is ideal for the base and framing because it resists rot and insect damage. For siding, options include T1-11 plywood, vinyl, or metal panels, each with its own advantages in terms of cost, maintenance, and appearance.
The roof can be constructed from asphalt shingles, metal panels, or corrugated plastic, depending on your budget and the local climate. Be sure to purchase galvanized or stainless-steel fasteners to prevent rust and extend the life of your shed. If adding windows or a skylight, look for weather-sealed products designed for exterior use.
Laying the Foundation
A strong, level foundation is crucial to a stable shed. Check out our guide about how to build a shed foundation. There are several types of foundations suitable for shed construction:
- Gravel Pad: This is the most common and economical option. It involves leveling the ground, laying landscape fabric, and filling it with compacted crushed stone.
- Concrete Slab: Best for permanent and heavy-duty sheds. It requires forming, pouring, and curing concrete, offering maximum stability.
- Skid Foundation: Pressure-treated skids can be placed directly on the ground or gravel base. They are fast and cost-effective for smaller sheds and offer some mobility.
Once the foundation is in place, confirm that it is square and level using a tape measure and spirit level.
Framing the Shed Floor
Begin construction with the floor frame. Use pressure-treated 2×6 or 2×8 boards to construct a rectangular frame according to your shed dimensions. Floor joists should be spaced 16 inches apart to support weight and distribute loads evenly.
Secure plywood or OSB sheets to the frame using exterior-grade screws or nails. Make sure all seams are tight and the surface is flush. If the shed will house heavy equipment, consider adding blocking between joists for additional strength. We also have a guide on how to build shed floors as well.
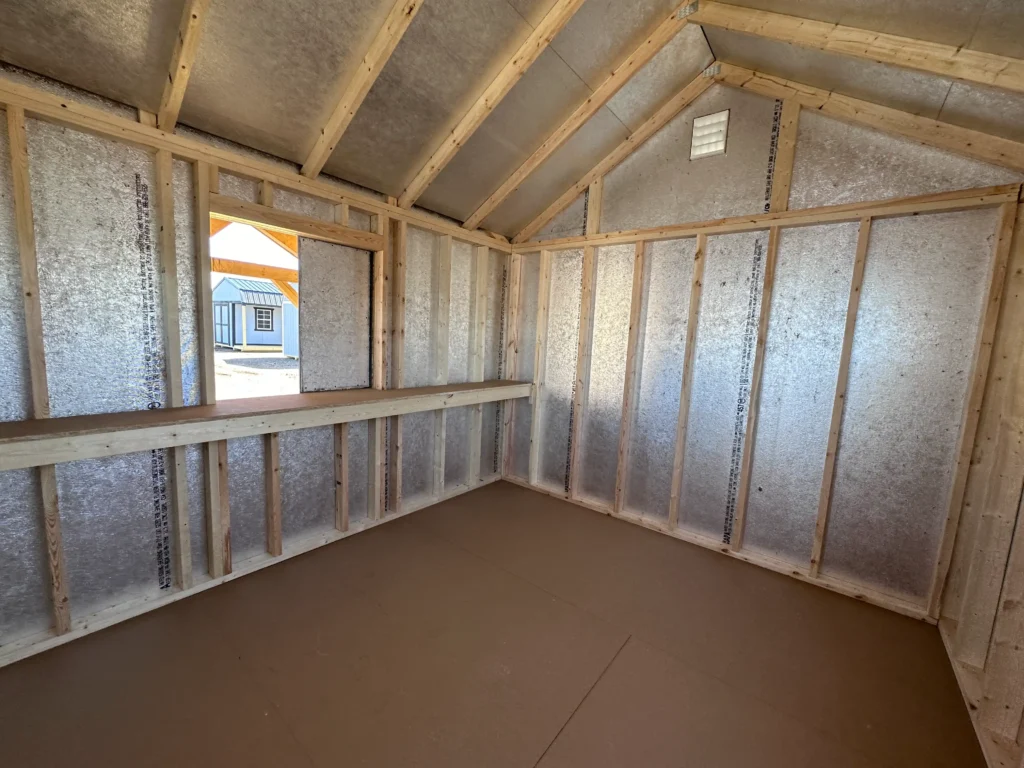
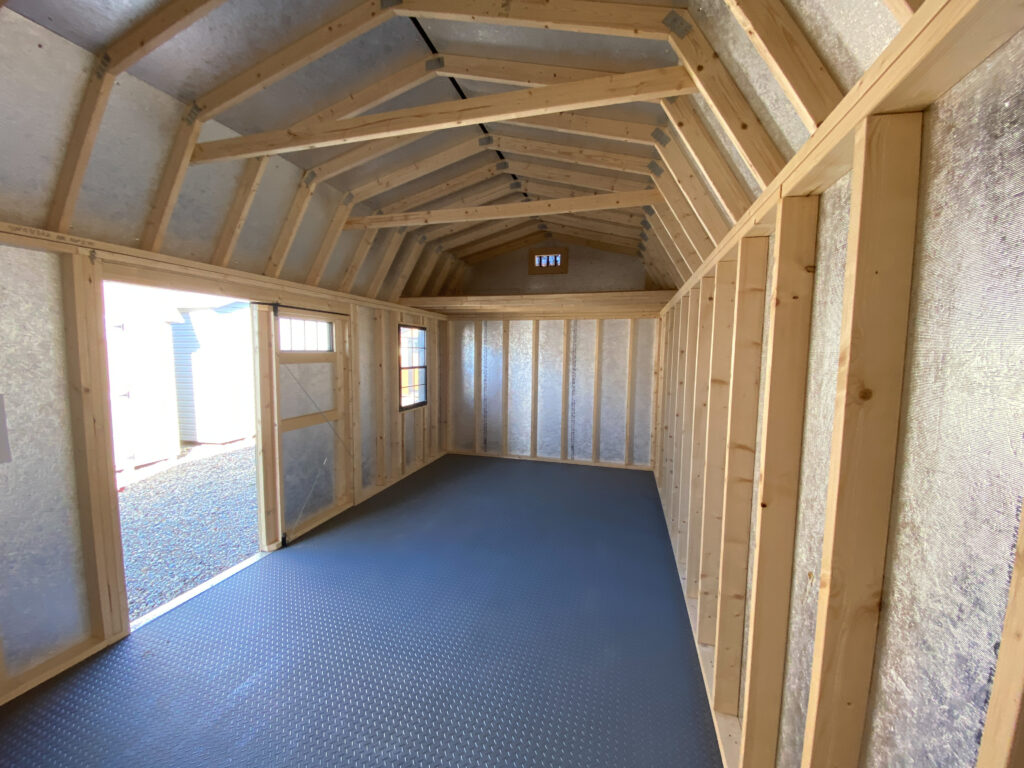
Building the Walls
Construct each wall on a flat surface before raising them into place. Use 2×4 lumber for studs, with top and bottom plates cut to length. Space the studs 16 inches apart, and include openings for doors and windows according to your plan.
After assembling each wall frame, lift and secure it to the floor structure. Use temporary bracing to hold the walls plumb until they’re all connected. Double-check alignment and squareness at each stage. Once all walls are in place, tie them together with top plates and reinforce the corners.
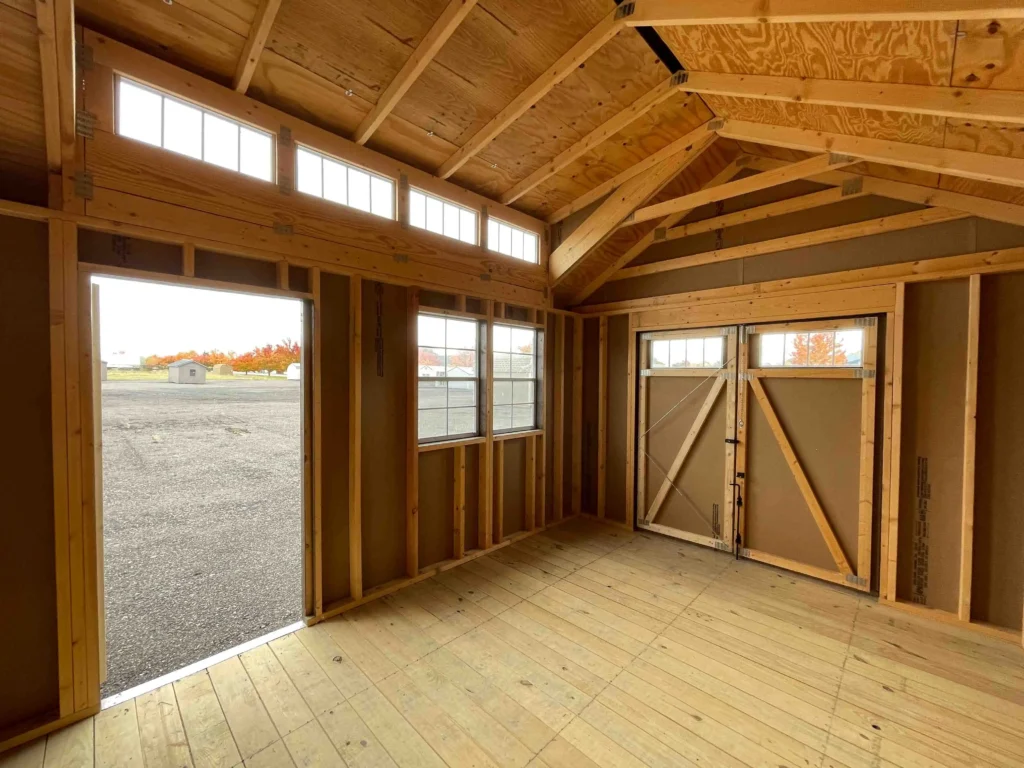
Installing the Roof Structure
The type of roof you choose—gable, lean-to, or saltbox—will determine your framing method. Gable roofs are the most common for sheds and involve building triangular trusses or cutting individual rafters to fit your pitch.
Secure the rafters to the top wall plates, spacing them evenly and aligning them at the ridge. Add collar ties and blocking as needed for stability. Install the roof sheathing using plywood or OSB panels, followed by underlayment and your selected roofing material. Flashing and drip edges should be installed to direct water away from the structure. Check out our fantastic guide on how to build a shed roof.

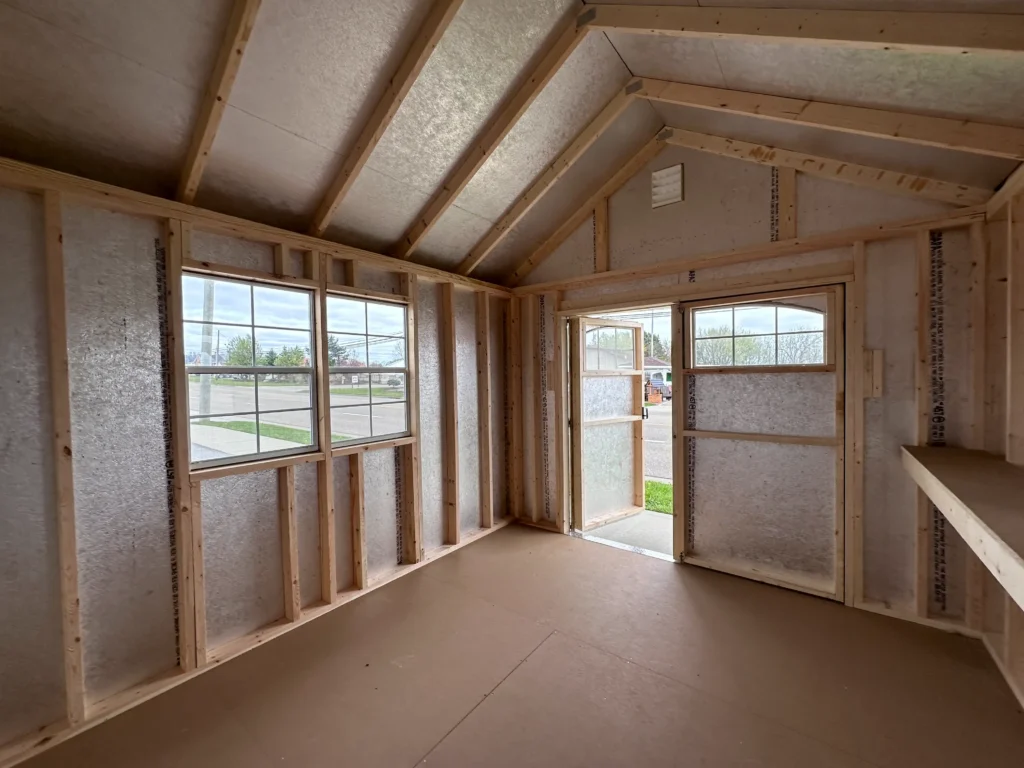
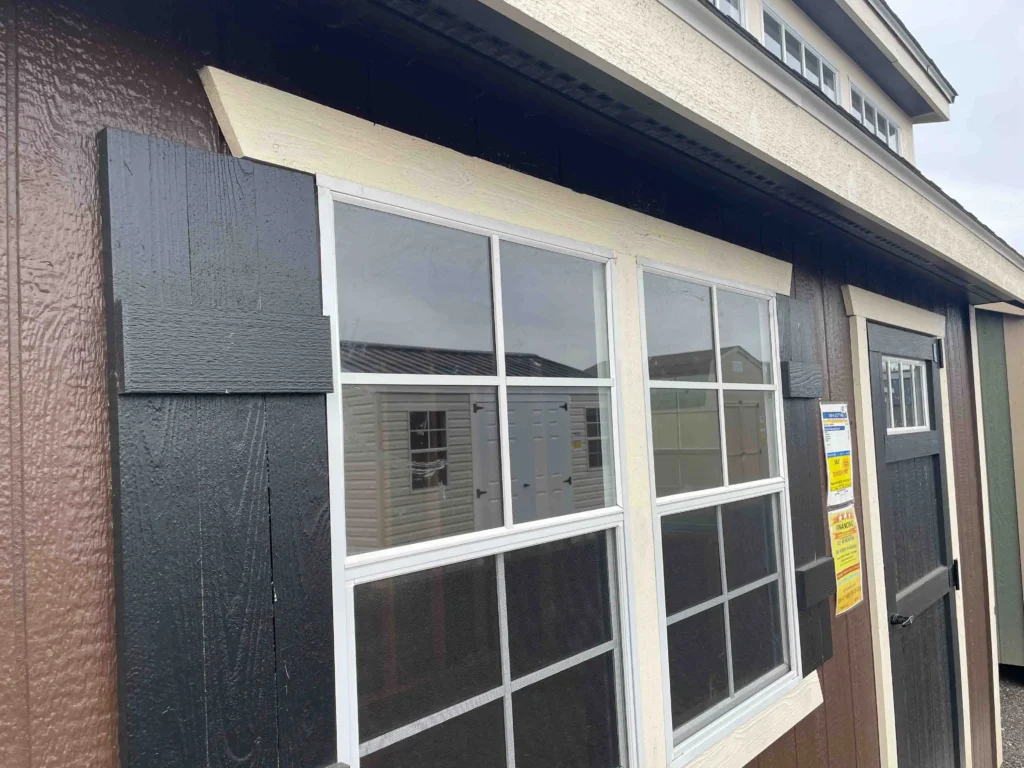
Adding Doors, Windows, and Siding
With the shed’s frame complete, install the doors and windows. Shed doors can be pre-hung or custom-built using the same materials as the siding. Install windows with flanges and flashing tape to prevent leaks.
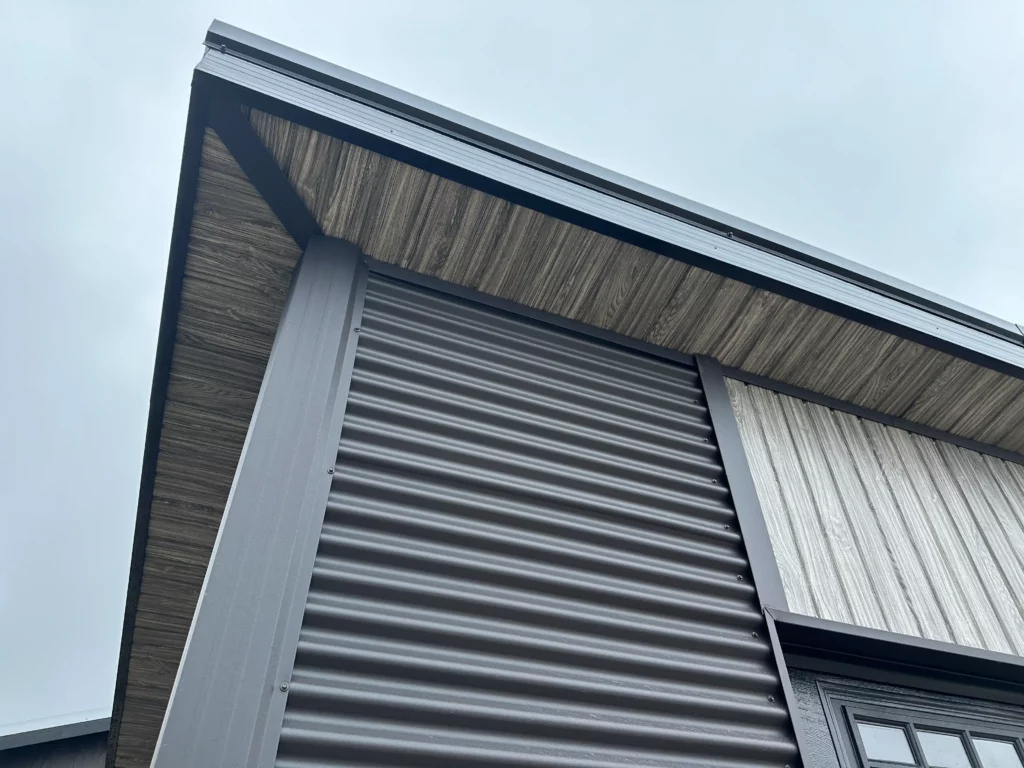
For siding, align and attach your chosen material to the exterior walls. T1-11 provides a classic look and can be painted or stained. Vinyl and metal siding are lower maintenance and weather-resistant. Seal all joints and apply caulking around openings to prevent drafts and moisture intrusion. Check out our shed door installation guide.
Painting, Sealing, and Interior Finishing
Protect your shed from the elements by painting or staining the exterior with a weatherproof finish. Use exterior-grade products that resist fading, cracking, and moisture damage.
On the inside, consider adding insulation if the shed will be used year-round. Install shelves, hooks, and storage solutions to keep the interior organized. If electrical service is needed, hire a licensed electrician to install outlets and lighting according to local codes.
Ventilation is also important. Add vents near the roof or install a small window to allow airflow and prevent condensation, especially if storing items sensitive to moisture.
Final Inspection and Maintenance Tips
Before using your shed, inspect all structural components to ensure they’re secure and weather-tight. Test doors and windows for smooth operation, and make any final adjustments.
Regular maintenance will extend the life of your shed. Clean the roof and gutters annually, repaint or reseal exterior surfaces every few years, and inspect for signs of rot or insect damage. Keeping the base clear of leaves and debris will also improve ventilation and reduce the risk of water damage.

Conclusion
Learning how to build shed from scratch gives you the freedom to create a functional, durable structure that suits your exact needs. By carefully planning each phase—from choosing materials and laying a solid foundation to framing, roofing, and finishing—you can build a shed that stands the test of time. With the right approach and a bit of dedication, your shed can become a valuable asset in your outdoor living space for years to come.