
How to Insulate a Garden Shed
Estimated reading time: 9 minutes
Insulating your garden shed enhances its usability throughout the year and protects your stored items from extreme temperatures. This guide will walk you through the process of how to insulate a garden shed. The article will focus on the best practices and materials to use. Knowing how to insulate a garden shed will save you a ton and help you keep your plants, storage items and tools safe from the harshest weather conditions.
Project Overview
Working Time: Depending on the size and complexity, this project can take a weekend or a couple of days to complete. However, the investment of time is well worth it for the benefits gained. Insulating a garden shed ensures it remains functional and comfortable even during extreme weather conditions. When you’re looking to create a cozy retreat in your insulated shed, proper insulation for the garden shed is essential. This comprehensive guide will delve into the various methods and materials for insulating a garden shed, providing the know-how to transform your outdoor space into a haven of comfort.
There are many shed insulation ideas available depending on your budget, climate, and intended use of the space. Some homeowners choose fiberglass insulation for affordability, while others prefer foam board or spray foam insulation for improved energy efficiency and moisture resistance. Understanding the available options helps you select the most effective insulation strategy for your shed.
Is It Worth Insulating A Garden Shed?
Materials Needed:
To effectively insulate a shed and create a comfortable environment, you’ll need the following materials:
- Fiberglass insulation
- Spray foam insulation
- Foam board insulation
- Mineral wool insulation
- Plastic vapor barrier
- Tape measure
- Insulation knife
- Utility knife
- Seam tape
- Door sweep
- Safety glasses
Properly insulating a shed is crucial for maintaining comfortable temperatures and protecting stored items from harsh weather conditions. There are various methods and materials for achieving effective insulation for outdoor sheds. Having the knowledge and materials to successfully conduct insulation in the shed and transform your space into a haven of protection is essential.
What Is The Best Thing To Insulate A Shed With?
The best material to insulate a shed depends on how you plan to use the space and the climate in your area. Fiberglass insulation remains a popular choice because it is affordable and provides strong thermal performance. Foam board insulation works well in sheds where moisture resistance and space efficiency are important. Spray foam insulation offers excellent air sealing and insulation value, making it ideal for year-round use. Mineral wool insulation is another effective option because it resists moisture, mold, and fire. Many shed owners combine multiple insulation materials to achieve the best balance of comfort, durability, and energy efficiency.
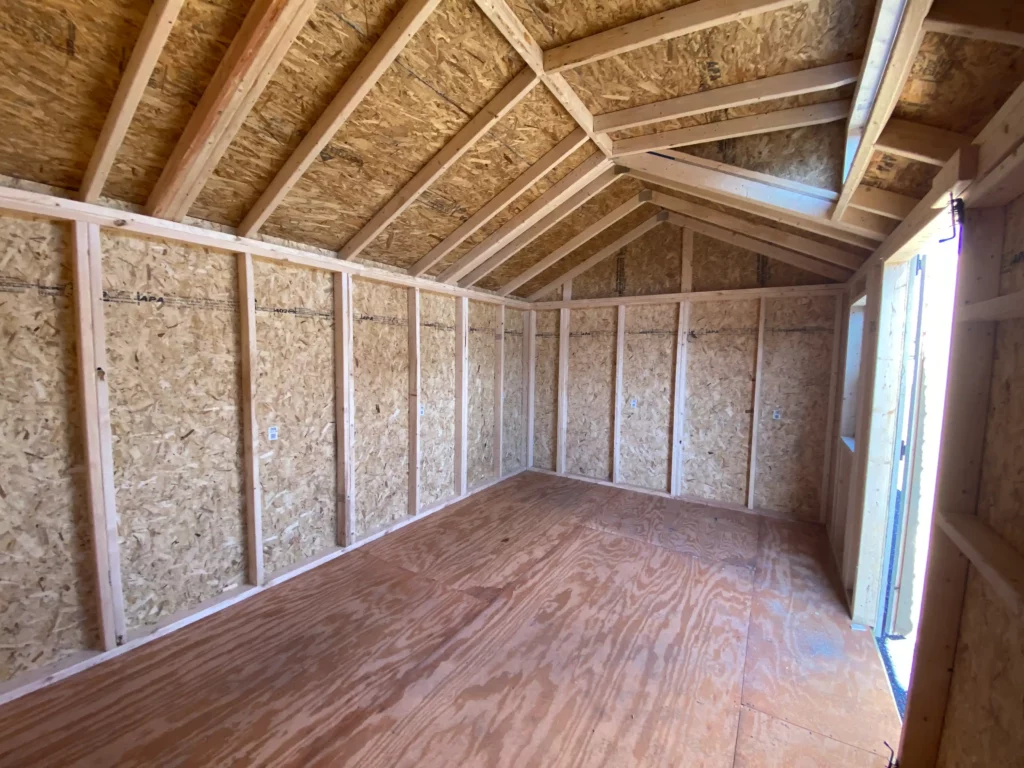
Step 1: Determine the Amount of Insulation Needed
First, measure the shed walls, shed floor, and shed roof to calculate the required insulation material. Use a tape measure to find the square footage and consider the R-value needed. Higher R-values indicate better-insulating properties, crucial for maintaining an effective thermal barrier against heat loss. When selecting the best insulation for outdoor shed, consider factors such as durability, moisture resistance, and ease of installation. Remember to account for any existing insulation or gaps that may need to be filled to achieve an insulated garden shed. Proper shed insulation not only regulates temperature but also helps reduce energy costs and protect your belongings.
Step 2: Choose the Right Insulation Materials
For the shed walls and roof, fiberglass insulation or mineral wool insulation are excellent choices because they are easy to install and provide a high R-value. For areas prone to moisture, spray foam insulation can act as both an insulator and a vapor barrier, helping to prevent moisture buildup. Foam board insulation is another popular option because it offers strong thermal performance while taking up minimal space. When choosing insulation, consider factors such as climate, budget, moisture exposure, and the intended use of the shed. A storage shed may require different insulation materials than a workshop, office, or hobby space. Selecting the appropriate garden shed insulation materials helps improve energy efficiency, reduce heat loss, and create a more comfortable environment throughout the year.
Step 3: Install the Vapor Barrier
Installing a plastic vapor barrier over the insulation on the shed walls and roof is vital to prevent moisture from penetrating the insulated areas. Ensure that small gaps are sealed using seam tape to enhance the barrier’s effectiveness. Incorporating a fully insulated shed requires careful attention to detail when implementing the vapor barrier. This step is crucial in insulating a shed effectively, as it helps maintain the integrity of the insulation and protects against moisture damage. Choosing the right materials and techniques for the insulation for sheds ensures long-term performance and durability.
Step 4: Insulate the Shed Roof and Walls
Begin by cutting the insulation material to fit each stud bay and wall height using an insulation knife or a utility knife. For shed roof insulation, carefully measure and cut the insulation to fit between the rafters. Batt insulation or roll insulation can be used effectively here. Many homeowners choose to insulate a shed roof from inside because it is one of the most practical and cost-effective installation methods. When installing insulation, ensure it fits snugly without being compressed, as compressed insulation can lose some of its effectiveness. Pay close attention to corners, edges, and hard-to-reach areas where air leaks commonly occur. Secure the insulation with appropriate fasteners and cover all gaps to reduce heat loss and improve the overall thermal performance of the shed. Proper installation helps maintain a more consistent indoor temperature throughout the year.
Step 5: Address the Shed Floor and Doors
Shed floor insulation can be an extra layer of protection against the cold ground. Foam board insulation is recommended here due to its durability and thermal properties. For the shed doors, consider adding spray foam or foam insulation strips around the edges and a door sweep at the bottom to seal against drafts.
Many homeowners also look for ways to insulate a shed floor from the top without removing the entire floor structure. In these situations, rigid foam board insulation can often be installed beneath a new plywood layer to improve thermal performance and reduce heat loss. Proper floor insulation helps create a more comfortable shed environment while protecting stored items from cold temperatures and ground moisture.
Step 6: Final Checks and Adjustments
Ensure that all areas are properly insulated and that there are no exposed gaps. Adding insulation to pre-built sheds may require additional adjustments or cutting to fit new shed specifications. Check the overall shed insulation for any areas that might need more coverage or additional vapor barriers. Conducting thorough inspections during this final stage ensures that your shed is well-prepared to withstand temperature fluctuations and moisture infiltration. Making necessary adjustments now can prevent future issues and optimize the performance of your shed insulation options.
Additional Tips:
- Always wear safety glasses and protective clothing when handling insulation materials.
- In warmer climates, ensure there is enough ventilation to allow for fresh air circulation, preventing overheating and condensation.
- Metal shed insulation might require more specialized insulation materials like foam board insulation or reflective bubble wrap to deal with the conductive properties of metal.
By following these steps and utilizing the right insulation materials, you can effectively insulate your garden shed, making it a more comfortable and functional living space for all your garden equipment and storage needs.
Conclusion
This guide has covered everything you need to know about insulating your garden shed. We’ve emphasized the importance of insulation and provided detailed steps for selecting materials and completing the installation process. Following these steps, you can create a comfortable and functional shed, no matter the weather. Consider factors like gaps and vapor barriers, and always prioritize safety. For all your garden shed insulation needs and more, look no further than Hartville Outdoor Products.
Our wide selection of insulation materials and expert advice can help you transform your outdoor space into a haven of comfort and protection. Don’t let extreme temperatures dictate the use of your shed. Take control of your environment with proper insulation. Visit us today to get started on your project and enjoy a more functional and comfortable shed all year round. With Hartville Outdoor Products, you’ll find everything you need to succeed in your shed insulation project. We hope this helps you understand how to insulate a garden shed.