
Good how to build a chicken coop instructions should cover much more than putting four walls around a flock. Chickens need a dry place to sleep, enough ventilation, secure nesting areas, sturdy roosts, and protection from predators. The structure should also be easy to clean and maintain. A poorly planned coop can become damp, crowded, hard to access, and vulnerable to animals trying to reach the flock.
Before buying lumber, decide how many chickens you expect to keep and how much room you can dedicate to the structure. Think about both indoor coop space and the outdoor run. You should also consider drainage, sunlight, shade, access for cleaning, and the distance from your house. Planning these details first will make construction easier and help you avoid rebuilding important parts later.
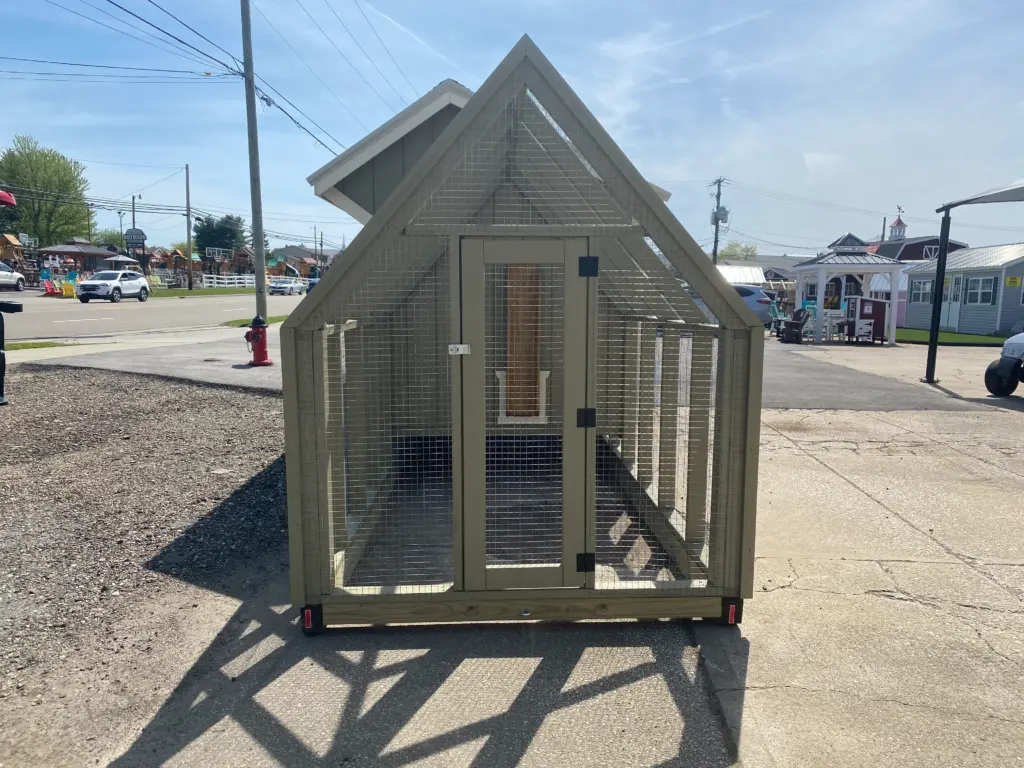
Plan The Chicken Coop Size And Layout
Start by deciding how many chickens the coop needs to hold. Standard-size chickens generally need several square feet of indoor space per bird, plus additional room in the outdoor run. Larger breeds need more space. Avoid designing the coop around the smallest possible dimensions. Extra room can reduce crowding and give you space if the flock grows. Include room for nesting boxes, roosts, feeders, waterers, and walking areas. Remember that these features reduce the amount of open floor space available to the chickens.
Draw a simple floor plan before construction starts. Mark the chicken entrance, human access door, windows, vents, nesting boxes, and roosting area. Think about how you will remove bedding and collect eggs. Large access doors make these tasks easier. If you want to compare your layout with a professionally built option, Hartville Outdoor Products offers in-stock chicken coops in several sizes and configurations. Looking at completed designs can help you decide how much space your flock may need.
Choose A Dry And Practical Location
The location of the coop affects its durability and the comfort of your chickens. Choose a level area that drains well after rain. Avoid low spots where water collects because constant moisture can damage floor framing and create muddy conditions around the entrance. Morning sunlight can help dry damp areas, while some afternoon shade can make the coop more comfortable during hot weather. Also check where water flows from nearby roofs and slopes.
Convenience matters too. Chickens need daily feeding, fresh water, egg collection, and regular observation. Place the structure somewhere you can reach easily throughout the year. Leave enough space around the building for cleaning, repairs, and possible expansion. Before building, check local requirements for poultry and accessory structures. Some communities regulate setbacks, flock size, building placement, or the distance between a coop and neighboring properties. Solving those issues before construction can prevent expensive changes later.

Build A Stable Foundation And Floor
A solid foundation supports the entire coop. Small buildings may sit on pressure-treated skids, blocks, piers, or another suitable base. Whatever method you use, keep untreated wood away from wet soil. Level the foundation carefully before building the floor frame. An uneven base can make walls difficult to square and doors difficult to operate. If the soil stays soft or muddy, consider preparing a compacted gravel area before installing the building supports.
Build the floor with framing that can support the structure, bedding, chickens, feeders, and anyone who enters for cleaning. Cover the joists with a durable floor surface that is easy to sweep or scrape. Close gaps that could allow rodents or predators to enter from below. If you elevate the coop, inspect the space underneath and prevent it from becoming an easy shelter for unwanted animals. Good how to build a chicken coop instructions should always treat the floor as a major structural component rather than an afterthought.
Frame The Walls, Doors, And Openings
Once the floor platform is square and level, begin framing the walls. Standard wood framing makes it easier to create strong corners and properly supported openings. Mark the locations of doors, windows, vents, and nesting-box access before assembling the walls. Use a full-size human door whenever possible. A larger opening makes it easier to carry feed, bedding, tools, and cleaning equipment into the coop. Add a separate smaller opening for the chickens.
Raise each wall carefully and fasten it securely to the floor frame. Check that the walls remain plumb before adding permanent bracing. Frame windows and ventilation openings during this stage rather than cutting through structural members later. Reinforce any area that will support nesting boxes or other exterior attachments. If you prefer to see how indoor shelter connects with outdoor access, the 6×8 chicken coop with a run from Hartville Outdoor Products provides a useful example of an enclosed coop connected to a protected run.
Add A Durable Roof And Proper Ventilation
The roof should protect the interior from rain, snow, and direct sunlight. Choose a roof style that fits the coop size and your local weather. A simple sloped or gable roof works well for many backyard structures. Install solid roof framing, sheathing, underlayment, and an exterior roofing material. Extend the roof edges beyond the walls when possible. This helps direct water away from siding and entrances. Make sure water does not drain directly into the chicken run.
Ventilation is just as important as weather protection. Chickens produce moisture through breathing and manure. Without airflow, humidity and odors can build up inside the coop. Place vents high on the walls so warm, moist air can escape. Keep strong drafts away from the roosting area. Cover ventilation openings with secure hardware cloth. Windows can provide extra airflow during warm weather, but they should close securely when needed. The goal is a dry, fresh interior rather than a completely sealed building.

Install Roosts And Nesting Boxes
Chickens prefer to sleep above the floor, so provide sturdy roosting bars. Place the roosts high enough to satisfy this natural behavior but low enough for birds to reach safely. Larger breeds may need lower roosts because they cannot jump as easily as lighter chickens. Allow enough length for every bird to settle without constant competition. Position the bars away from strong drafts and keep them where you can clean underneath them easily.
Nesting boxes should provide a quieter area where hens can lay eggs. You usually do not need one box for every chicken because several hens may share the same box. Place nesting boxes below the main roosting area so chickens are less likely to sleep inside them. Make egg collection simple by keeping the boxes within easy reach. Add clean nesting material and check the boxes regularly. A thoughtful interior layout will make the coop easier to manage every day.
Build A Secure Outdoor Run
A secure run gives chickens room to walk, scratch, dust bathe, and explore while limiting exposure to predators. Build the run with strong framing and durable hardware cloth. Lightweight chicken wire can help contain chickens, but stronger material generally provides better predator resistance. Pay close attention to the bottom of the enclosure. Animals may try to dig underneath the fence, so secure the lower edge carefully. Depending on local wildlife, you may also need protection across the top of the run.
Include a gate large enough for easy cleaning and maintenance. Use a reliable latch that predators cannot easily manipulate. Add shaded areas where chickens can escape strong sun. A covered section can also provide shelter during rain. Keep feeders and waterers where you can reach them without struggling through narrow openings. For general background on chicken housing and flock behavior, see chicken coops on Wikipedia. The outdoor area should work as part of the complete shelter rather than as an afterthought.

Finish The Coop For Easy Cleaning And Long-Term Use
Complete your how to build a chicken coop instructions by thinking about daily maintenance. Smooth rough wood, remove exposed nails, and check every interior surface for sharp edges. Add bedding that suits your cleaning routine and climate. Keep waterers positioned where spills will not soak the floor. Store feed in secure containers to discourage rodents. Inspect doors, latches, roofing, ventilation openings, and fencing regularly. Small repairs are much easier to handle before they become major problems.
A successful coop should stay dry, secure, easy to clean, and large enough for the flock. If you prefer to avoid building every part yourself, Hartville Outdoor Products offers chicken coops and other outdoor structures designed for practical backyard use. Whether you build from scratch or choose a finished structure, focus on strong construction, good ventilation, secure outdoor access, and convenient maintenance. Those features will make caring for your chickens easier and help the coop remain useful for many years.